Wednesday, 22 July 2015

macrame plant hanger / mini terrarium

I have been making these macrame plant hangers for our upcoming school fair.  I have had so many requests for a tutorial so here it is!


You will need:
8.5m or fine cord. Piping cord or builders line work great, in this tutorial I am using fine piping cord from lincraft which is approx 3mm wide and only 28c per metre.
Shower curtain rings
Wooden beads (optional)
Jar or pot

Firstly cut your cord into four 2m lengths. Find the middle of all four pieces of the cord and make a loop. Place the loop through the curtain ring and bring the ends through the loop and pull tight. I make sure I do this over the opening of the curtain ring to get a nicer finish. Now the cord is secured to the ring you are ready to start the hanger.


Divide the cord into fours. Measure down approx 40cm and tie a knot in each, I use the first one as a guide so they will be even. You should now have four knotted strands.


The size of the jar will depend on the next set of knots as it will need to fit through once all knotted together. I used a medium size jar so I measured down approx 5cm.

Divide your knotted cord into two strands each. Take one strand and knot together with the strand next to it. Continue to knot the strands until they are all joined together making sure the knots are even This is a bit tricky to explain so take a look at the pics......


Measure down another 5cm and repeat the last process of dividing and knotting the strands.


Now once all knotted measure down another 5cm, bring all your strands together and tie a knot at the bottom and your hanger is done! You might want to make sure your jar fits so don't tie the knot too tight so you can adjust it if it doesn't. Once you are happy with how it hangs pull the knot tight to secure it.

TIP: when making these it is so much easier to the the end secured to a hook, a drawer knob or in my case my big toe! I pop the curtain ring over my big toe to hold it all secure, makes it so easy to make sure all the knots are even and tight. I didn't post a pic of this because its winter and in desperate need of a pedicure and once on the internet forever on the internet haha! You can see what I mean in one of the above pics (the photo with my hands in it).

Now take your jar and wind the remaining cord around the top and tie ends together. Finish with some wooden beads and you are done!


Once you get the hang of it you will be making these in minutes!


If you make from this tutorial, I would love to see the results, tag me on facebook, instagram or send me an email!

Jodie xx


Wednesday, 24 June 2015

Mid Century set of drawers makeover


It was a regular Saturday morning, the kids had an early morning swimming lesson and I had just had my 564th rant for the week about having toys scattered all over the house. On the way home from swimming I had decided to call into one of my fave op shops to try and find some sort of funky under bed storage solution for the toy problem. I was thinking drawers I could upcycle with casters on the bottom...along those lines.


We entered the very large op shop and I had my usual scan around to see if anything caught my eye, then I saw some mid century drawers just waiting for me. It was quite busy that day and there was a young couple looking at an ordinary 70's chipboard/laminate dresser. They seemed to be tossing up between my drawers and the dresser. I casually said to them "If it was me I would buy the drawers, they are much better quality and half the price." They said thank you but I could tell they were thinking go away weirdo! My brain kicked in, why was I telling people to buy them? I need to buy them!!!  So I ran, not walked, RAN (totally confirming my weirdo status) to the counter to get a sold sticker. By this time there were quite a few people buzzing around the drawers, get out of my way people I have the sold sticker!


So I got home, and got to work straight away, I had completely forgotten the toy issue but hey that can wait for another day, I have a project! I started with Citristrip stripper, I cannot express how fond I am of this product. I painted the stripper on the entire piece. Once the stripper had done its thing, I scraped all the varnish off with a plastic scraper and washed the residue off with warm soapy water (I use sugar soap) and a plastic scourer. I then left the piece to dry for 24 hours before sanding.
During the stripping process
After stripping, before sanding

Stripped and sanded
Once dry I sanded with my electric sander with a 120grit sandpaper followed by fine sanding with  400 grit then 600 grit until it was super smooth. Once sanded I could see what I was working with. I initially applied two coats of Scandinavian Oil (AKA Danish oil) The solid timber elements such as the drawers and the beading came up beautifully and were given a wax finish with carnauba wax. Unfortunately the top and sides were a veneer so didn't look quite as nice once oiled. Not happy with the finish I decided to paint the top and sides. I don't usually like to paint Mid Century furniture, I am more of a strip and refinish kind of girl. The top had a bit of damage with some deep gouges and scratches as did the sides. Also the veneer was a different colour to the timber so painting was the best option.

After the first coat of oil

At first I thought I would paint them a nice Charcoal grey. Unfortunately once it was painted it looked awful! Like 90's office furniture! I was devastated so I starting thinking.......white, you can never go wrong with white!!! So away I went covering the grey with white. When Zac saw the drawers he said "Oh, they are white, that's kind of boring." I asked him what he wanted and he rattled off a heap of colours, I suggested stripes and he loved the idea. I decided the spray paint the stripes, to achieve a cleaner line and a more robust finish. We went with white, woodland grey, shale grey, Teal blue - 'Lagoon' from Rust-oleum and a geenish/dirty mustard yellow called 'Wiggle' from the Dulux dura max range. The dura max range is amazing, dries so quickly and coverage is wonderful. My other favourite is Ironlak spray paint, its not as easy to find as its mostly used for graffiti art but  the colour range is stunning, dries super quick and sticks like nothing else!!

Painting stripes is not a job that can be done quickly. Its a matter of taping a section, painting and waiting to fully dry before painting the next section. Patience is the key, make sure you paint is fully dry before taping and always use a painters tape that is for delicate and freshly painted surfaces otherwise your paint may peel or you might get bleeding under the tape. Honestly I cannot stress how much a good quality tape is worth it for a job like this. You may not want to spend $10 on a roll of making tape but its so worth it! It will save you so many headaches in the long run, especially painting stripes where you need clean edges.
Painting stripes

Mask off and use a roll of paper to stop overspray
Now the drawers are taken care of time to work on the legs and hardware. The legs were stripped, sanded, oiled and waxed. The original handles were quite pitted and worn so I decided to clean them up and reuse them. I gave them a good scrub and sand with fine sandpaper. I applied a couple of coats of etch primer which is a special primer for metal. I then sprayed the handles with a metal spray paint in woodland grey to match one of the stripes. The same process was followed for the leg caps.

Handles before
Leg caps
So here is the finished product!! Zac loves it!


I also found this super cool quilt cover set from Mambo called "Road Trip" I purchased from Spotlight (image via spotlight), he loves quirky things and Mambo's art is certainly that!
Jodie xx 


Wednesday, 3 June 2015

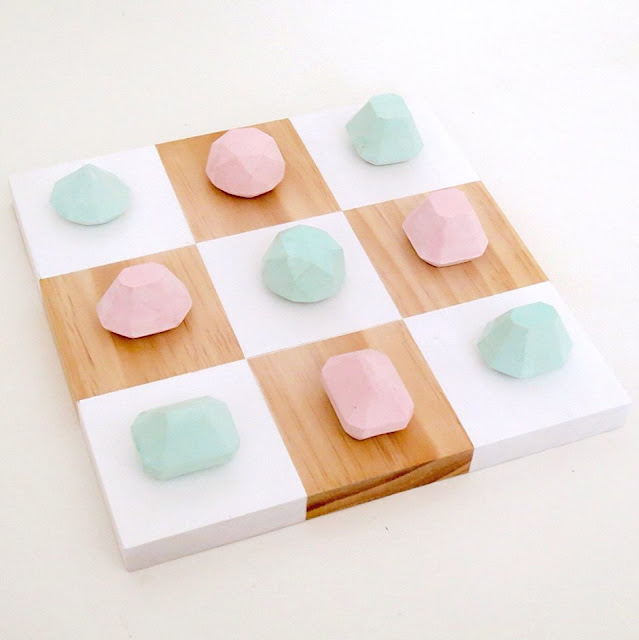
diy tic tac toe game

With our school fair (and school holidays) fast approaching I thought I would share something I have made for the craft stall. My kids love playing Tic Tac Toe (or noughts and crosses) so here is my spin on the game.

Firstly I had some pine timber pieces cut into squares, my timber board is 18cm x 18cm. I gave them a sand to make sure there will be no splinters, especially around the edges. Once sanded, I applied a coat of danish oil to protect the timber, this step isn't necessary but it does give a nicer finish.

To mark out the squares, divide each side by 3, mark with a pencil dot and tape the board with masking tape. Make sure you use good quality painters tape otherwise you run the risk of the paint bleeding under the tape.

Using a sharp knife and a metal ruler carefully cut the tape and remove it to make the centre square.


Now paint your board, I use spray paint as its so much quicker and I like the smooth finish, you could also paint the board by hand. After the board has dried, apply a wax finish and you are done! I used a carnauba wax but any timber wax will do. Again you can skip this step however it really does make the timber board feel silky smooth and gives a much nicer finish.....I am a bit fussy!!!

I found some plastic animals at a $2 shop and at Kmart. I painted the animals with spray paint, five gold and five coloured. To get a good coverage with your colour spray paint (especially fluro colours), spray the animal matt white first, you will get a better overall finish and more even colour. I also use a box as a mini spray booth, stops your paint ending up where it shouldn't!
 

These fun little games also make a great décor item, they have been a hit with my kids so I am hoping they are a hit at the fair!


Of course if you would like to buy a ready made game, you can purchase this one in my online store HERE


Or this one  HERE


Make sure you keep an eye on  my blog, Instagram and Facebook pages.
Jodie xx


Tuesday, 12 May 2015

Side table upcycle


I found this vintage plant stand in an op shop a while ago, I loved the mid-century design so I went on a mission to find the perfect pot to sit on top for my fiddle leaf fig. Unfortunately finding that perfect size/shape pot was almost impossible so I ended up buying a basket for the fig. In the garage the plant stand stayed.
 
I had seen a few table upcycles on instagram using the large round cheese board from Kmart, that got me thinking......it just so happens it was a perfect size table top! I didn't want the writing on the top so I used the blank underside.


The timber was lovely but way too dark for my liking so I painted it white. Painting made such a difference! It also looked much better upside down as a table base.

All was left to do was flip it over, add some brackets and screw it all together!
These are the brackets I used
A perfect little functional and fashionable side table.


Please don't forget to follow me on Facebook, Pinterest and Instagram!
 
Jodie xx